Other Properties and Methods Using OpenPyXL

Method

>>> ws.title   # The name of the worksheet

‘Sheet’

>>> ws.sheet_state   # The visibility state

‘visible’

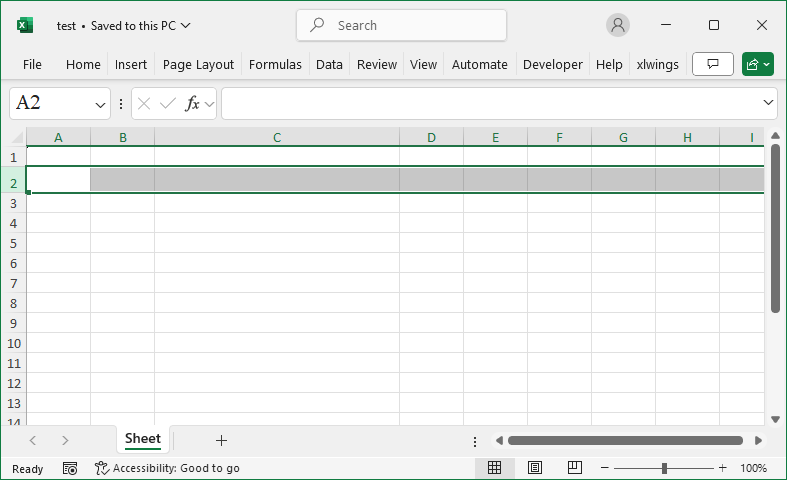
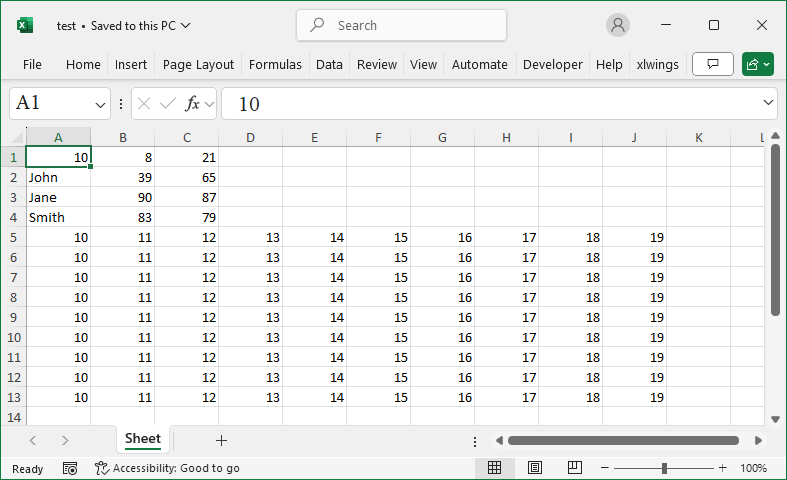
>>> ws.dimensions  # The size of the area containing data in the table

‘A2:G10’

>>> ws.sheet_properties  # Properties related to the worksheet, including tabColor, tagname, etc.

>>> ws.sheet_properties.tabColor=’FF0000′   # Set the background color of the tab label

>>> ws.active_cell     # The active cell

‘C9’

>>> ws.selected_cell    # The selected cell

‘C9’

Sample Code

#Other Worksheet Properties and Methods

#Import load_workbook function
from openpyxl import Workbook

#Create a new workbook
wb=Workbook()
#Get the active worksheet
ws=wb.active

#Worksheet title
print(ws.title)
#Visibility status
print(ws.sheet_state)
#Size of the portion of the table that contains data
print(ws.dimensions)
#Worksheet properties including tabColor, tagname etc.
print(ws.sheet_properties)
#Set the background color of the tab label
print(ws.sheet_properties.tabColor='FF0000')
#Active cell
print(ws.active_cell)
#Selected cells
print(ws.selected_cell)

wb.save('test.xlsx')
wb.close()

How To Change Row Height and Column Width Using OpenPyXL?

Method

Use the `row_dimensions` and `column_dimensions` properties to set or get row heights and column widths by their index.

For example:


ws.row_dimensions[2].height = 20

ws.column_dimensions[“C”].width = 15

Sample Code

#Adjusting Row Height and Column Width

#Import load_workbook function
from openpyxl import Workbook

#Create a new workbook
wb=Workbook()
#Get the active worksheet
ws=wb.active

#Set the height of row 2 to 20
ws.row_dimensions[2].height=20
#Set the width of column C to 35
ws.column_dimensions['C'].width=35

wb.save('test.xlsx')
wb.close()
Change Row Height and Column Width Using OpenPyXL

How To Traverse Regions Using OpenPyXL?

Method

Use a nested `for` loop to iterate over the range A1:C3 and output the data in each cell.

>>> for row in ws[“A1:C3”]:   # Iterate through the rows in the range

            for cell in row:    # Iterate through each cell in the rows

                print(cell.value)

The following code saves the data from the specified range into the list `data` and outputs the data.

>>> data = []

>>> for row in ws[“A1:C3”]:

           rv = []

           for cell in row:

               rv.append(cell.value)

           data.append(rv)

>>> print(data)

The following properties provide the bounds of the data area in the worksheet:

  • min_row:the minimum row number of the data area
  • min_column:the minimum column number of the data area
  • max_row:the maximum row number of the data area
  • max_column:the maximum column number of the data area
  • The `iter_rows` and `iter_cols` methods allow for iterating through specific rows and columns within a given range.

Sample  Code

#Iterating Through Cell Ranges

#Import load_workbook function
from openpyxl import Workbook

#Create a new workbook
wb=Workbook()
#Get the active worksheet
ws=wb.active

#Iterate through the rows within a cell range
for row in ws['A1:C3']:
    #Iterate through the cells of each row within a cell range
    for cell in row:
        print(cell.value)    #Output the value of each cell

#Save the data from a specified range into a list called data
data = []
for row in ws["A1:C3"]:
    rv = []
    for cell in row:
        rv.append(cell.value)
        data.append(rv)
#Output the list
print(data)

#Get and output data using the range property
#provided by the worksheet object
wb=load_workbook('test.xlsx')
ws=wb.active
print([ws.min_row,ws.max_row,ws.min_column,ws.max_column])

for row in ws.iter_rows(min_row=3, max_col=4, max_row=5):
    line = [cell.value for cell in row]
    print (line)

for col in ws.iter_cols(min_row=3, max_col=4, max_row=5):
    line = [cell.value for cell in col]
    print (line)

wb.save('test.xlsx')
wb.close()

How To Traverse Rows/Columns Using OpenPyXL?

Method

Use the `rows` property to iterate over all rows with data, and `columns` to iterate over all columns with data. The `values` property provides access to the data in the sheet’s cell range.

Sample Code

#Iterating through Rows and Columns

#Import load_workbook function
from openpyxl import Workbook

#Create a new workbook
wb=Workbook()
#Get the active worksheet
ws=wb.active

#Iterate through each cell in the first row
for cell in ws['1']:
    print(cell.value)    #Output the value of each cell

#Iterate through each cell in the first column
for cell in ws['A']:
    print(cell.value)    #Output the value of each cell

#Iterate through the first to third rows
for row in ws['1:3']:
    for cell in row:      #Iterate through each row's cells
        print(cell.value)    #Output the value of each cell

#Iterate through the first to third columns
for column in ws['A:C']:
    for cell in column:   #Iterate through each column's cells
        print(cell.value)    #Output the value of each cell

#Iterate through all rows using the rows attribute of the worksheet
for row in ws.rows:
    line=[cell.value for cell in row]
    print (line)

#Iterate through all columns using the columns attribute of the worksheet
for column in ws.columns:
    line = [cell.value for cell in column]
    print (line)

#Use the values attribute to return data from each row, returned as a list
for row in ws.values:
    print(row)

#Output as a list
for row in ws.values:
    print(list(row))

wb.save('test.xlsx')
wb.close()

How To Reference Single or Multiple Rows/Columns Using OpenPyXL?

Method

Reference rows or columns by their index or column letter.


Reference a single row/column

Reference continuous multiple rows/columns

Sample Code

#Accessing Specific Rows and Columns

#Import load_workbook function
from openpyxl import Workbook

#Create a new workbook
wb=Workbook()
#Get the active worksheet
ws=wb.active

#Get the 10th row
row10=ws[10]
#Get the 3rd column
colC=ws['C']

#Get multiple rows
rows1=ws[5:10]
#Get multiple columns
cols1=ws['C:D']

wb.save('test.xlsx')
wb.close()

How To Insert and Delete Rows/Columns Using OpenPyXL?

Method

To insert rows or columns, use the `insert_rows` and `insert_cols` methods.

ws.insert_rows(idx,amount=1)

>>> ws.insert_rows(idx=2,amount=5)

ws.insert_cols(idx,amount=1)

>>> ws.insert_cols(idx=2,amount=2)


To delete rows or columns, use `delete_rows` and `delete_cols` methods.

ws.delete_cols(idx,amount=1)

ws.delete_rows(idx,amount=1)

Sample Code

#Inserting and Deleting Rows and Columns

#Import load_workbook function
from openpyxl import Workbook

#Create a new workbook
wb=Workbook()
#Get the active worksheet
ws=wb.active

#Insert 1 empty row above the 5th row
ws.insert_rows(5)
#Insert 3 empty rows above the 5th row
ws.insert_rows(5,3)

#Insert 1 empty column to the left of the 4th column
ws.insert_cols(4)
#Insert 3 empty columns to the left of the 4th column
ws.insert_cols(4,3)

#Delete the 5th row
ws.delete_rows(5)
#Delete the 4th column
ws.delete_cols(4)

#Delete 3 rows starting from the 5th row
#(including the 5th row)
ws.delete_rows(5,3)
#Delete 3 columns starting from the 4th column
#(including the 4th column)
ws.delete_cols(4,3)

wb.save('test.xlsx')
wb.close()

How To Add Rows In a Worksheet Using OpenPyXL?

Method

To add a new row of data at the bottom of the current worksheet, use the `append` method:

ws.append(iterable)

Where `iterable` is a list, tuple, dictionary, range, or generator. For a list, the elements are added to the row’s cells in order. If it’s a dictionary, the corresponding keys will add their values.

Sample Code

#Adding Rows

#Import load_workbook function
from openpyxl import Workbook

#Create a new workbook
wb=Workbook()
#Get the active worksheet
ws=wb.active

#Add two rows of list data
ws.append([10, 8, 21])
ws.append(['John', 39, 65])

#Add two rows of dictionary data
ws.append({'A':'Jane', 'B':90, 'C':87})
ws.append({1:'Smith', 2:83, 3:79})

#Use a for loop to continuously add row data
for row in range(1, 10):
    ws.append(range(10,20))

wb.save('test.xlsx')
wb.close()
Add Rows In a Worksheet

How To Copy and Move Worksheets Using OpenPyXL?

Method

To copy a worksheet, use the `copy_worksheet` method:

>>> copy_sheet=wb.copy_worksheet(ws)

To move a worksheet (cut and paste), use the `move_sheet` method:

>>> wb.move_sheet(ws, offset=1)

The `offset` parameter specifies the number of positions to move the worksheet. If the value is greater than 0, the source sheet moves to the right by the specified number; if it’s less than 0, it moves to the left.

Sample Code

#Copying and Moving Worksheets

#Import load_workbook function
from openpyxl import Workbook

#Create a new workbook
wb=Workbook()
#Get the active worksheet
ws=wb.active

#Copy worksheets
copy_sheet1=wb.copy_worksheet(ws)
copy_sheet2=wb.copy_worksheet(ws)
#Specify the title of the first copied worksheet
copy_sheet1.title='NewSheet'

#Move worksheets
#If the offset value n > 0, move n columns to the right;
#n < 0, move n columns to the left
wb.move_sheet(ws, offset=1)

wb.save('test.xlsx')
wb.close()

How To Reference Worksheets Using OpenPyXL?

Method

sheets=wb.worksheets

ws=sheets[0]     #Using sheet index

ws2=wb[Sheet]    #Using sheet name

ws3=wb.get_sheet_by_name(Sheet)


names=wb.sheetnames

ws4=wb[names[0]]

Sample Code

#Accessing Worksheets by Index or Name

#Import load_workbook function
from openpyxl import load_workbook

#Load the workbook
wb=load_workbook(filename='wb2.xlsx')
#Get the worksheet collection object
sheets=wb.worksheets
#Access the first worksheet using the index
ws=sheets[0]
#Output the title of the worksheet
print(ws.title)

#Access the worksheet by name
ws2=wb['Sheet']
#Output the title of worksheet ws2
print(ws2.title)

#Use get_sheet_by_name function to access a specified worksheet
ws3=wb.get_sheet_by_name('Sheet')
#Output the title of worksheet ws3
print(ws3.title)

#Get all worksheet names
names=wb.sheetnames
#Access the corresponding worksheet by the first name
ws4=wb[names[0]]
#Output the title of worksheet ws4
print(ws4.title)

wb.save('test.xlsx')
wb.close()

How To Store and Manage Worksheets Using OpenPyXL?

Method

Newly created worksheet objects are automatically added to the `worksheets` collection. You can extract objects from this collection using indexing or iteration, and also remove objects from it.

To access the `worksheets` collection of a workbook object:

>>> sheets=wb.worksheets

>>> sheets[0].title

‘Sheet’

>>> sheets[1].title

‘MySheet’


Accessing the active worksheet:

>>> ws=wb.active

If you don’t know the worksheet name but know the index, use the `sheetnames` property to get all sheet names and reference the sheet by index:

>>> names = wb.sheetnames

>>> ws4 = wb[names[0]]


To remove a worksheet from the collection:

>>> wb.remove(ws)

Check how many objects are in the collection:

>>> sheets=wb.worksheets

>>> len(sheets)

Sample Code

#Managing and Storing Worksheets

#Import load_workbook function
from openpyxl import load_workbook

#Load the workbook
wb=load_workbook(filename='wb2.xlsx')
#Create a new worksheet
ws1=wb.create_sheet()
#Get the worksheet collection object
sheets=wb.worksheets
#Output the title of the first worksheet
print(sheets[0].title)
#Output the title of the second worksheet
print(sheets[1].title)

#Output the worksheet collection
print(sheets)
#Output the number of worksheets in the collection
print(len(sheets))

#Iterate through the workbook and
#output the titles of each worksheet
for sheet in wb:
    print(sheet.title)

#Delete the newly created worksheets
wb.remove(ws1)
#Re-fetch the number of worksheets
#in the collection and output it
sheets=wb.worksheets
print(len(sheets))

wb.save('test.xlsx')
wb.close()